If you use accounting software, generating transaction statements is a breeze. You just input the client and period, and the statement is created automatically. However, if you manage your records with Excel or Google Sheets, it can be more tedious.
Today, we’ll explore how to create a transaction statement by entering a client and period using the QUERY function in Google Sheets. While custom templates can be created for specific businesses, we’ll focus on the key points for this lesson.
Setting Up Transaction Statements

Creating a Sales Log and Transaction Sheet:
Create the following sales log, transaction statement form, and client list.
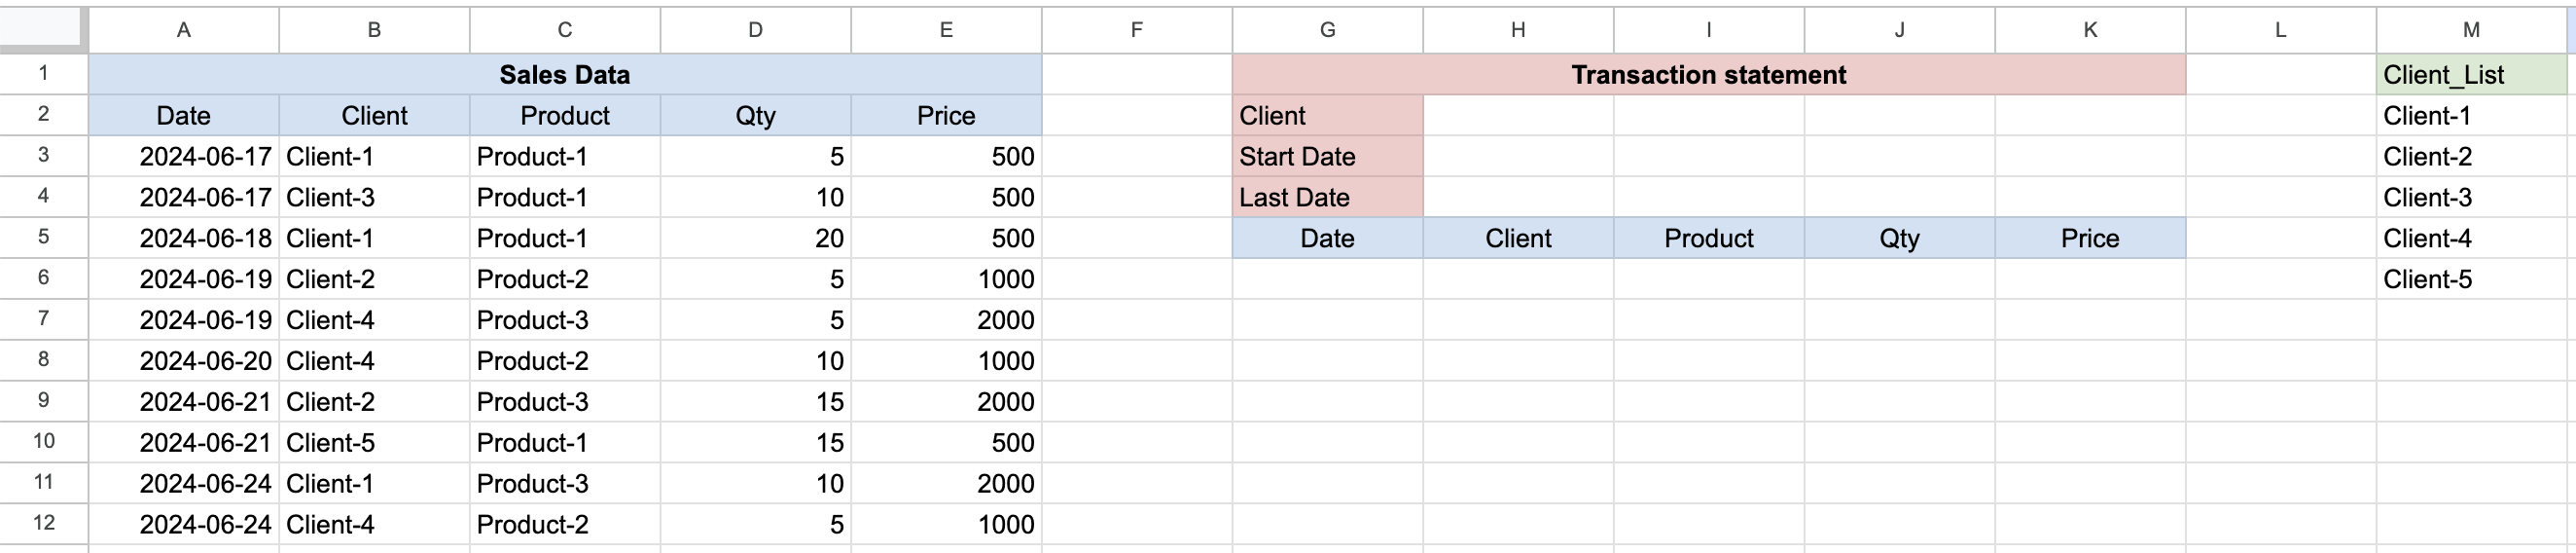
- Sales Log (Columns A, B, C, D, E):
- Column A: Date
- Column B: Client
- Column C: Product
- Column D: Qty
- Column E: Price
- Transaction statement (Columns G, H, I, K, K):
- Cell G2: Client
- Cell G3: Start Date
- Cell G4: Last Date
- Cell G5 – K5 : Sales Data label (Data, Client, Product, Qty, Price)
- Client Sheet (Columns M):
- Column M: Client_List (Named ranges)
First, let’s set up the client list and date range fields. You will use named ranges and data validation to ensure accurate data entry.
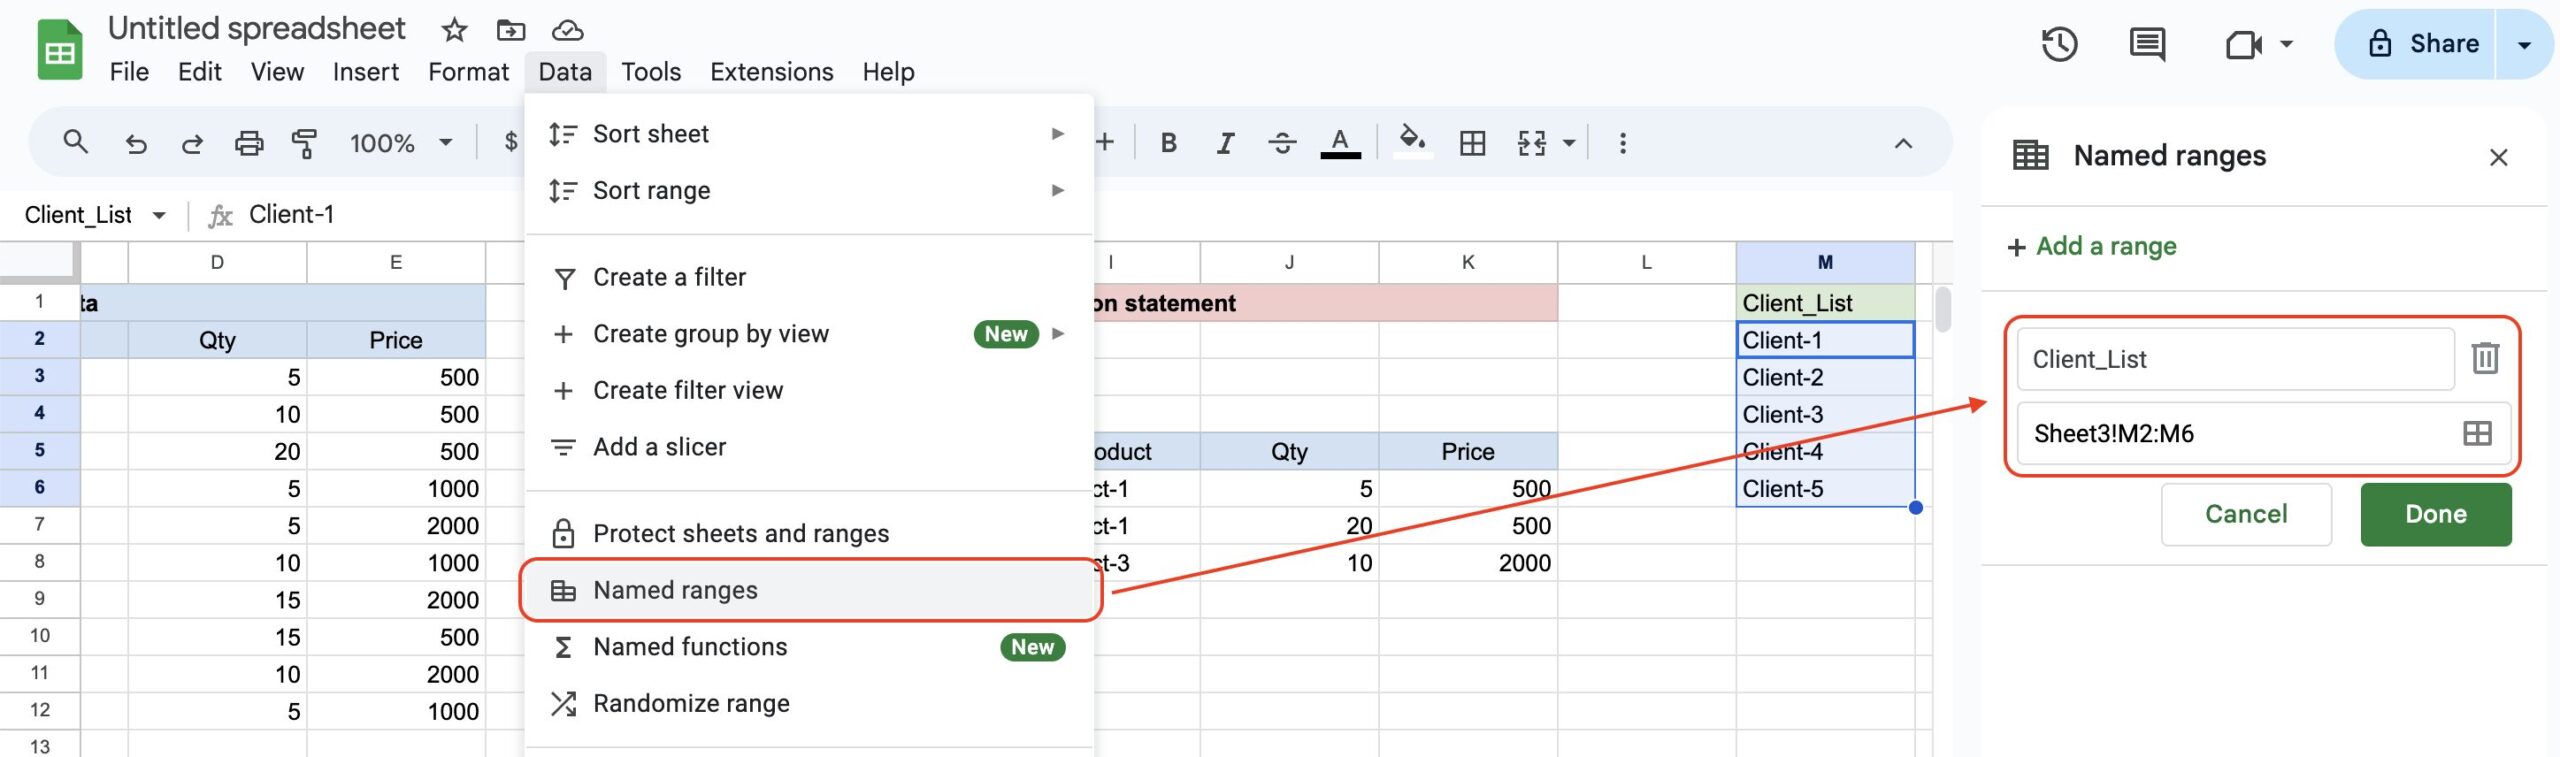
Create Named Ranges for Clients:

- Select the range of client names in your transaction data.
- Go to
Data > Named ranges, and name the range “Client_List”.
Apply Data Validation for Client Selection:
- Select a cell where you want to input the client (e.g., H2).
- Go to
Data > Data validation, and set the criteria to “List from a range” using the named range “Client_List”.
Querying the Transaction Data (G6)
Basic QUERY to Retrieve All Data:

=QUERY(A2:E1000, "SELECT *")This query retrieves all data from the specified range.
Filter by Client
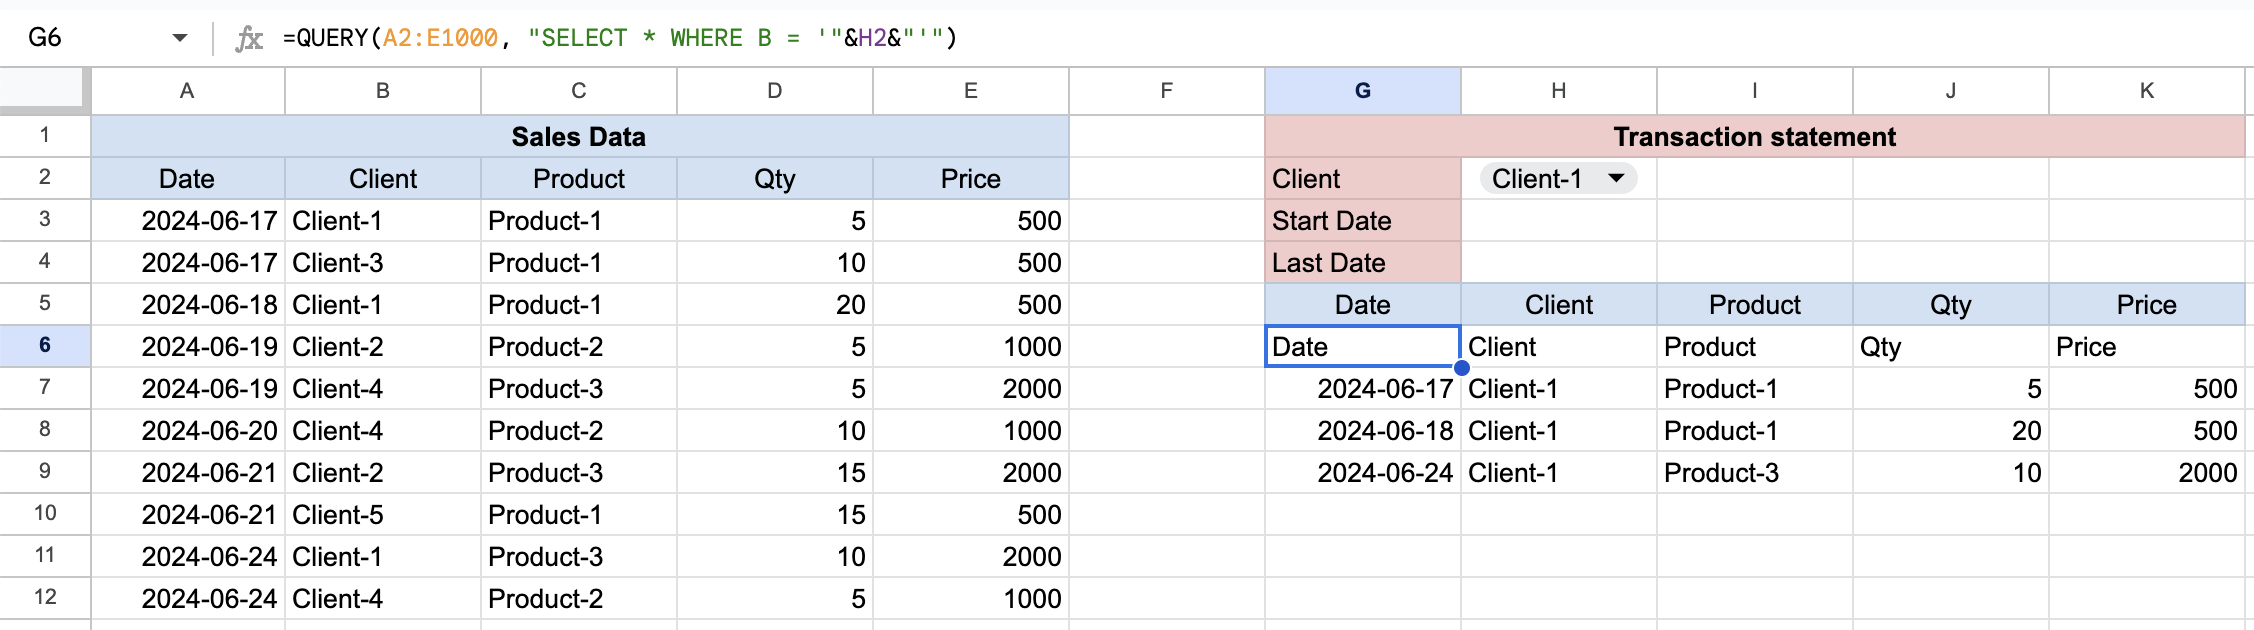
To filter by a specific client selected in cell H2, modify the query as follows:
=QUERY(A2:E1000, "SELECT * WHERE B = '"&H2&"'")
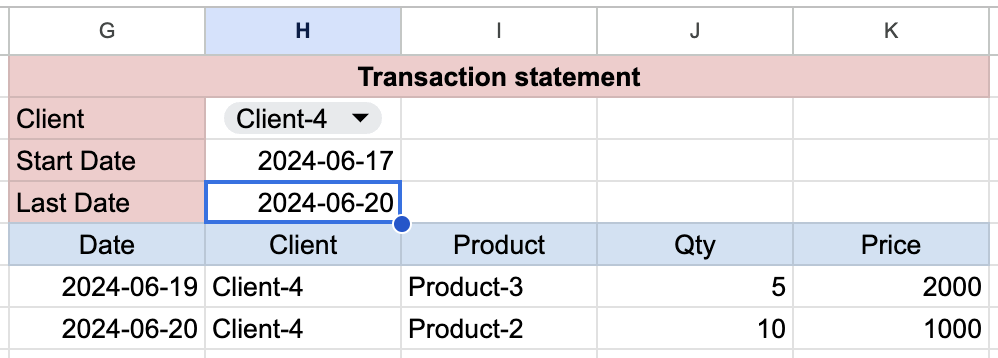
Add Date Range Filters
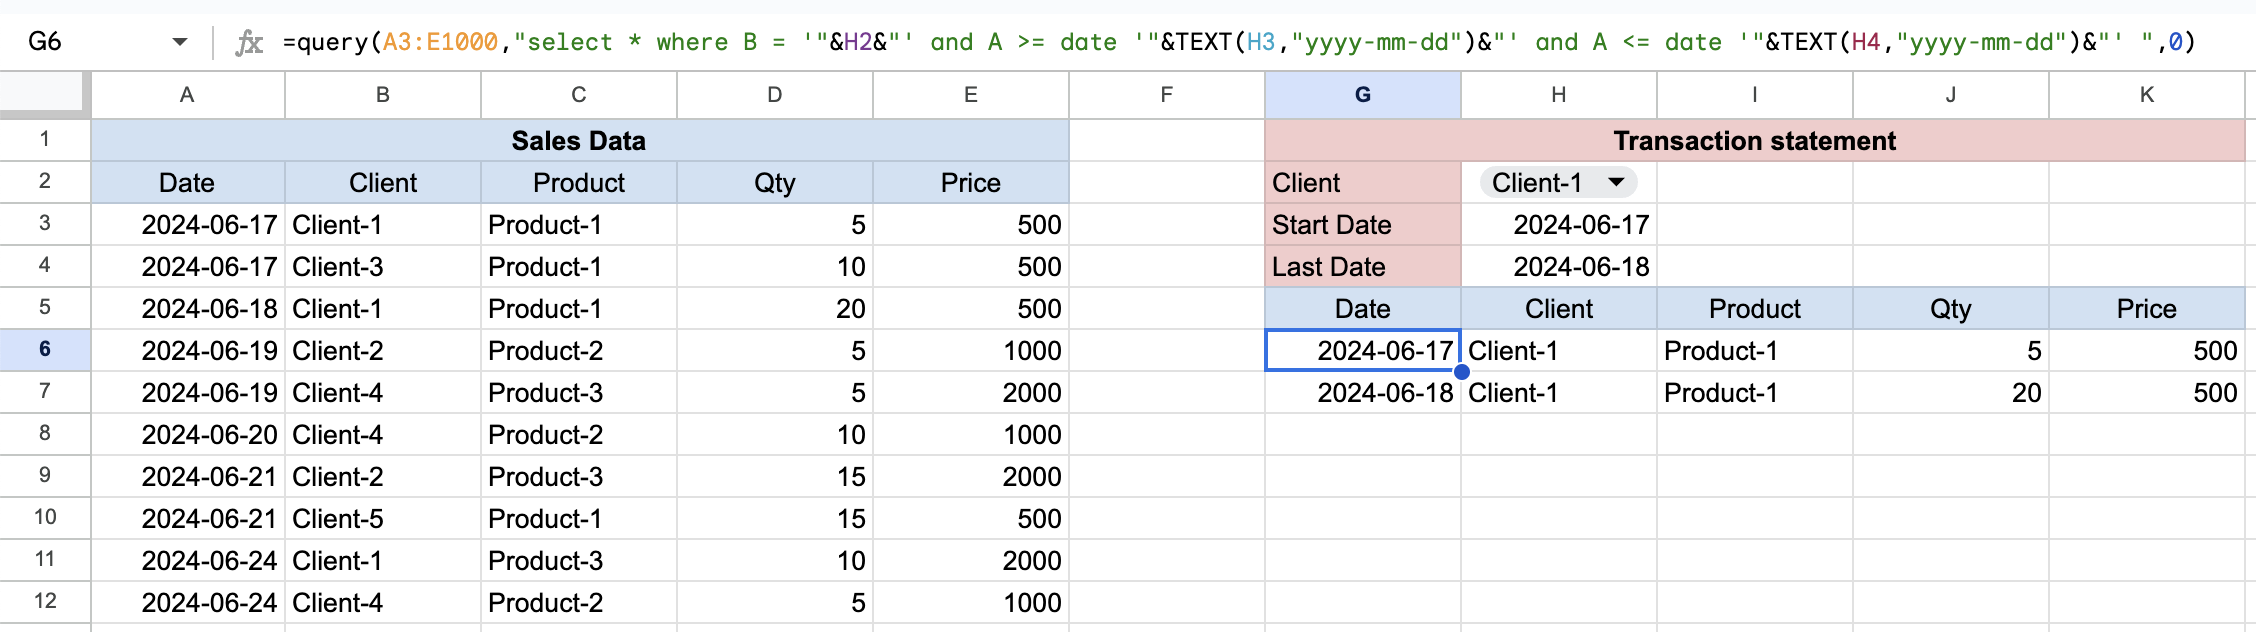
Adding date filters requires the date to be formatted correctly. Use the TEXT function to format the dates from H3 and H4.
TEXT(H3,"yyyy-MM-dd")
TEXT(H4,"yyyy-MM-dd")
Full query (select * where “client condition” and “start-date condition” and “last-date condition”)
=query(A3:E1000,"select * where B = '"&H2&"' and A >= date '"&TEXT(H3,"yyyy-mm-dd")&"' and A <= date '"&TEXT(H4,"yyyy-mm-dd")&"' ",0)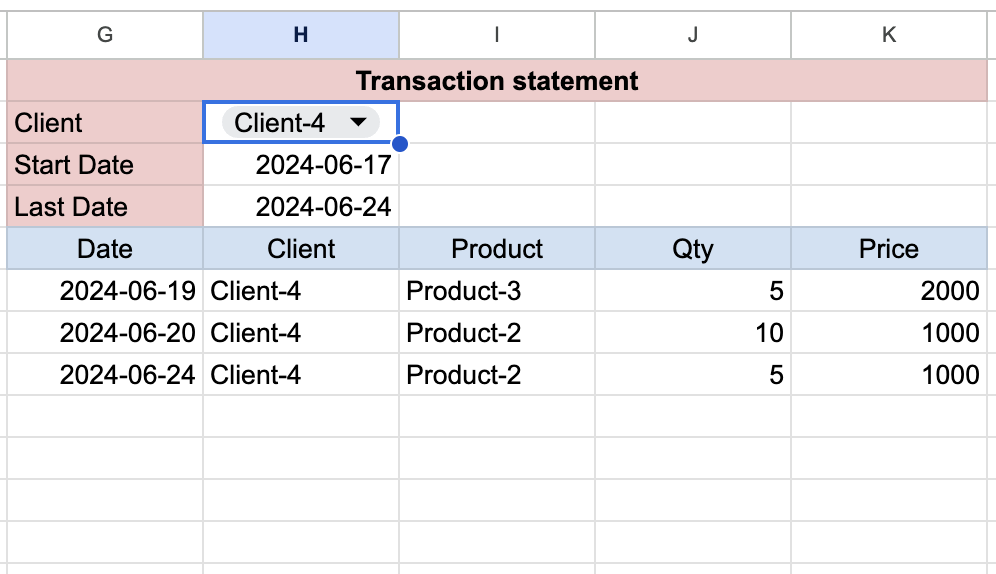
Using the QUERY function in Google Sheets allows you to generate transaction statements efficiently by selecting a client and specifying a date range. This method provides flexibility and ensures accurate filtering of your transaction data.
By mastering these functions, you can significantly streamline your data management processes and enhance your spreadsheet skills.
For more detailed information on using QUERY, visit the official website here.
For more information on how to do more with Google Sheets, see this guide.
> Mastering Spreadsheets: Calculating Days Since Last Client Visit Using QUERY, DATEDIF & VLOOKUP
> Mastering Spreadsheets: Extracting Unique Data Using FILTER and MATCH
> Mastering Spreadsheets: Highlighting Duplicate Entries with Conditional Formatting
> Mastering Spreadsheets: Named ranges + Data validation rules = Perfect
> Mastering spreadsheets: Goal seek(with PMT)
> How to Create a Line Chart in Google Sheets: A Beginner’s Guide
> Google Sheets Org Chart Guide: A Beginner-Friendly Tutorial
#Google Sheets #QUERY #Transaction Statements